Chances are, you have had much success in your previous DIY projects. But there is always one task that seems more menial than others. We are of course referring to the task of laying out tile. Regardless of what you think, there is nothing quite like the look and feel of brand-new tile sheets to liven up a dated or gloomy looking room. You might have several places in your home that are ideal for a tile installation. But for those who are unfamiliar with the appropriate procedures, fear not. We’ve got you covered. For today, let’s talk 5 do-it yourself tile tips for contractors and homeowners.
Laying Out The Room
While ceramic tile is easier to install than some other types of flooring, proper planning is critical. Before you follow any of the installation steps below you must first spend a considerable amount of time planning your layout. It’s a good idea to loose lay tiles to try various approaches before you start mixing mortar. The more time you spend laying out your area, the better your project will go.
Floor Preparation
Surface to be tiled must be flat, structurally sound, dry and free from oil, grease, and dirt. Any imperfections in the floor should be patched with a waterproof patching compound.
Getting Squared Up
Snap chalk lines with a 90-degree intersection, preferably in the center of the room. Since all rooms vary in size and shape, consult your sales representative for specific advice regarding your project.
Mixing Mortar
Thoroughly mix the mortar powder with clean water and stir to a toothpaste-like consistency. Allow mixture to stand as instructed on package then stir and use. It is best to only mix what can be used in 30 minutes. Stir mixture occasionally to keep creamy, but never add water once you get started because it will weaken the mix. In the event the mix becomes stiff in the pail, discard and make a fresh batch.
Applying Mortar
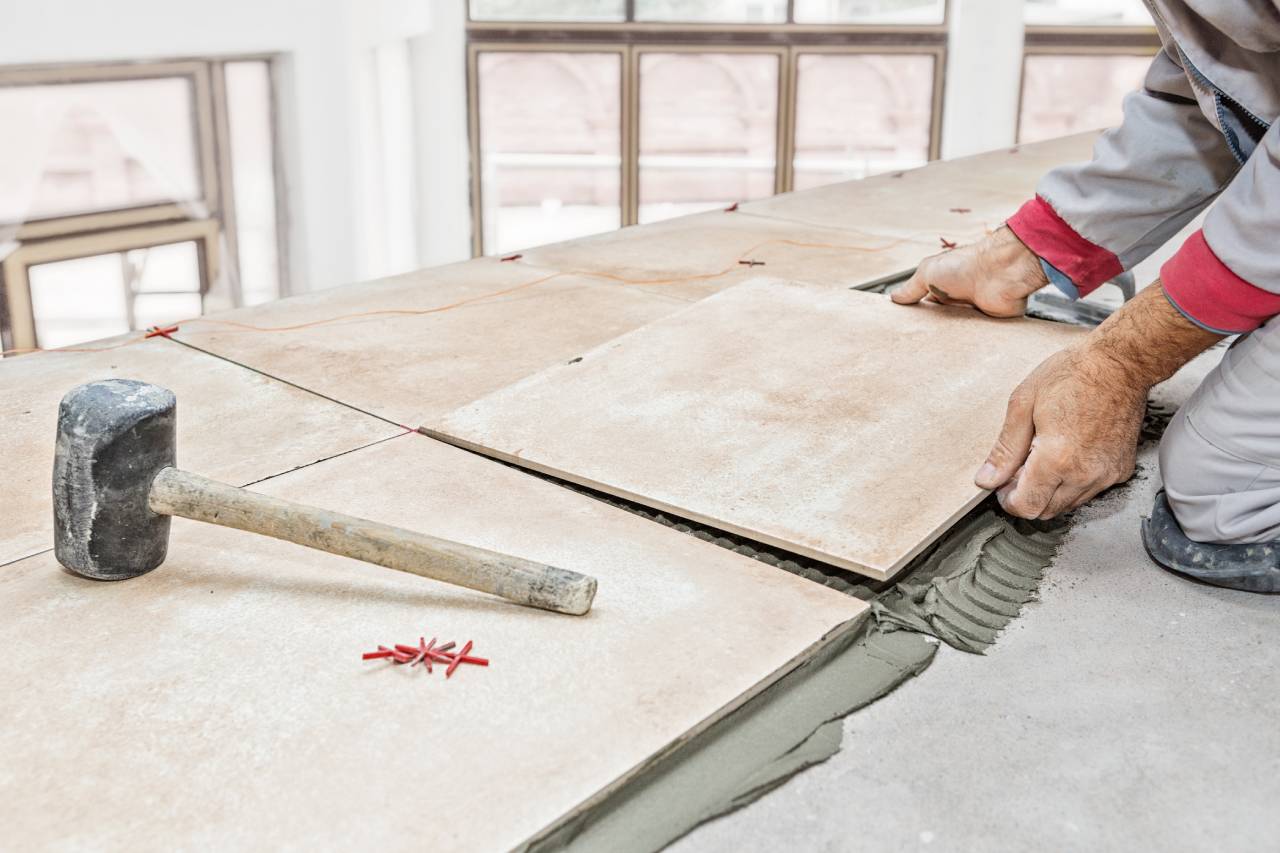
First apply your mortar using the flat side of the trowel to promote substrate contact. Then, using the recommended notch trowel at a 45-degree angle spread the mortar uniformly in a ridged pattern. Continue applying mortar in a straight pattern. Do not swirl the trowel.
Spread only an area that can be tiled in 10 to 15 minutes (or while surface is still tacky). Press tile into mortar with a slight twisting motion. To prevent any voids or air pockets under the tile, use a small block of wood or rubber mallet and carefully tap the top of each tile to insure complete contact with mortar.
Do Not Walk on Tile for 24 Hours
Grouting
After the mortar has dried 24 hours, you are ready to grout. There are a variety of grout colors available to enhance the look of your tile floor. When working with grout it is mandatory to keep conditions as consistent as possible throughout the job: moisture, temperature, mixing and application.
Mixing Grouting
Mix the grout powder as instructed on bag to a consistency like toothpaste. It is better to mix no more than can be used within 20 minutes. Mix each batch until all the pigments are dispersed and wet. Allow the grout to stand as instructed on the package. The proportion of powder to water and the mixing time for each batch should be identical.
Applying Grout
Use a grout float to work the grout into the tile joints. Skim off the excess grout with the edge of the Grout Float and wipe the tile immediately with a damp sponge. Rinse the sponge frequently and change the rinse water regularly. It is better to grout small areas at a time so no grout will dry on the face of the tile. Remove all of the grout with the exception of a fine film. This film can be buffed off in 30 to 45 minutes using a clean, dry cloth. For particularly tough areas where grout was inadvertently left on the tile after the clean-up phase, use a grout haze remover with a scrub pad.


0 Comments